
If you’ve ever looked at cakesicles and thought “mine will never look like that”…
I promise you—they can.
When I first started making cakesicles, I didn’t use fancy molds or professional tools. I used what I had, learned what worked (and what didn’t), and found simple designs that still looked clean, elevated, and bakery-worthy.
In this post, I’m sharing 5 easy cakesicle designs that:
- Are beginner-friendly
- Don’t require advanced skills
- Still look like you paid $5+ each for them
And yes—these are the exact types of designs you can sell or post and have people asking:
👉 “Can I place an order?”
Before You Start (Quick Tips)
Before we get into the designs, here are a few things that will make your cakesicles look instantly better:
- Use good melting chocolate (this matters A LOT)
- Let cakesicles chill before dipping
- Tap off excess chocolate for a smooth finish
- Work in a cool room (prevents cracking)
💡 These small details are what take your cakesicles from homemade → professional
Design #1: Classic Drizzle Elegance
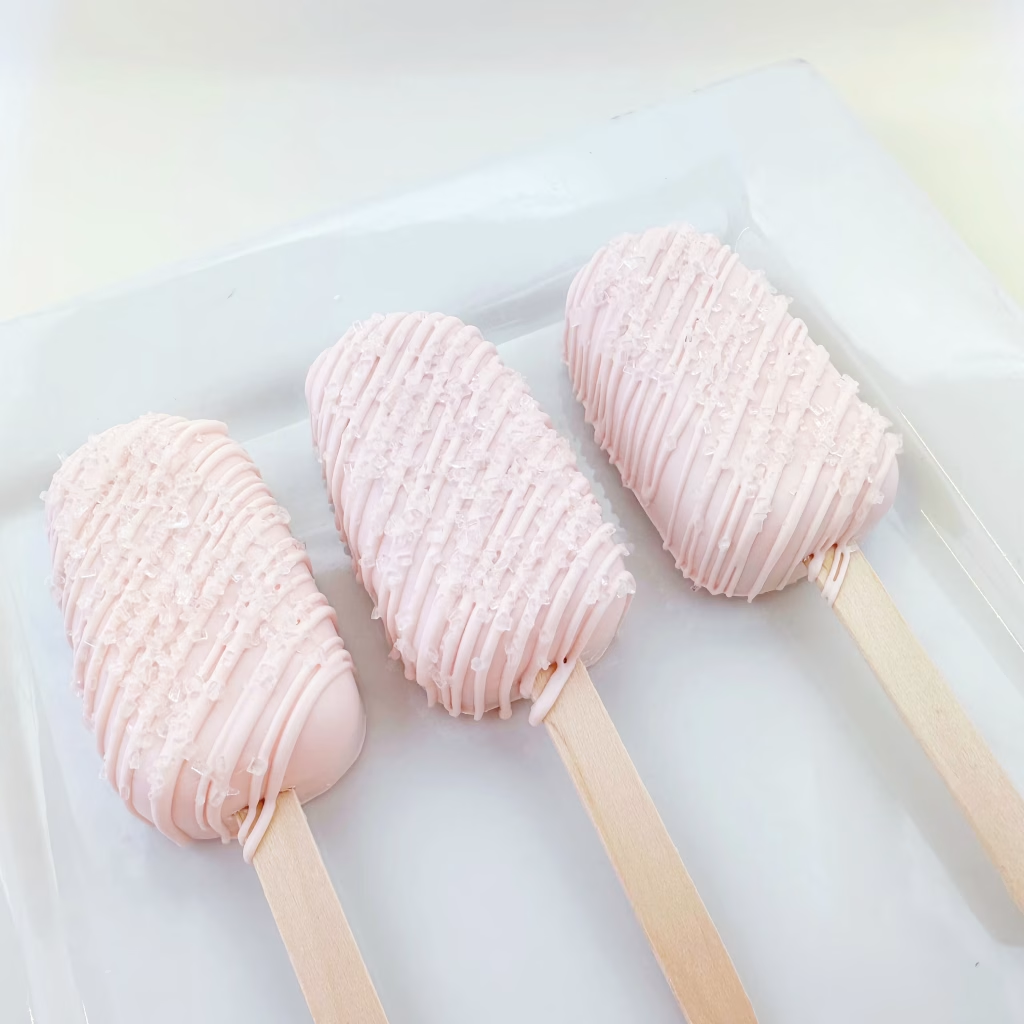
Look: Clean base + chocolate drizzle
Why it works: Simple but ALWAYS looks good
How to do it:
- Dip cakesicle in your base color (white, pink, brown)
- Let it fully set
- Drizzle contrasting chocolate using a spoon or piping bag
💡 Color combos that always hit:
- White + gold drizzle
- Pink + white drizzle
- Milk chocolate + dark drizzle
👉 This is one of the easiest ways to look like a pro FAST
Design #2: Sprinkle and Drizzle

Look: Bottom dipped in sprinkles
Why it works: Adds texture + color instantly
How to do it:
- Dip cakesicle fully in chocolate
- Immediately dip the bottom into sprinkles
- Let set standing upright
💡 Pro tip:
Use coordinated sprinkle mixes (not random ones)
👉 This design is PERFECT for:
- Birthdays
- Baby showers
- Spring themes
Design #3: Gold Splatter Luxury

Look: Minimal + gold splatter
Why it works: Looks expensive with almost no effort
How to do it:
- Dip cakesicle in a solid color (white, black, blush)
- Mix edible gold dust with a little extract
- Flick brush lightly over cakesicle
💡 Less is more here—don’t overdo it
👉 This is your luxury bakery look
Design #4: Half & Half Dip

Look: Two-tone split design
Why it works: Clean, modern, and eye-catching
How to do it:
- Dip cakesicle fully in one color
- Let set
- Dip halfway into second color at an angle
💡 Keep your dips clean and confident (no shaking)
👉 This design photographs REALLY well for social media
Design #5: Simple Fondant Accent

Look: Minimal fondant detail
Why it works: Adds personality without overcomplicating
How to do it:
- Dip cakesicle and let set
- Add small fondant shape (heart, cloud, number, letter)
- Attach with melted chocolate
💡 Keep it SMALL and centered
👉 Perfect for:
- Baby showers
- Birthdays
- Custom orders
Beginner Tools That Make This Easier
If you want your cakesicles to actually come out clean and consistent, these are the tools I personally recommend:
- Cakesicle poppers (instead of molds 👀)
- High-quality melting chocolate
- Piping bags for drizzle
- Offset spatula
- Cake boards + packaging
👉 I’ll be linking all my favorites in my next post so you can shop everything in one place
Final Thoughts
You don’t need to be a professional baker to create cakesicles that look like you are.
Start simple. Stay consistent. And focus on clean designs that people actually want to buy.
Because the truth is…
👉 Simple sells.
And these designs?
They’ll get you noticed.